Monday, October 25, 2010

Best Grilled Cheese Tip

Sorry for the radio silence once again! I know I always have excuses, but a few days after my last post I got sick with a fever that lasted almost 10 days, mostly spent in bed sleeping or catching up on the schoolwork I missed. I also have tons of photos on my camera waiting to be posted, but the battery is dead and I cannot find the charger anywhere! Ugh. Excuses, excuses, I know.

I do have a new food tip for you though! Alex bought me a subscription to the Canal House Cookbooks for my bridal shower in June. If you aren't familiar with them, they are a series of cookbooks published three times a year with amazing photography, elegant writing, and amazing recipes. One of the essays in the latest edition is written by one of the author's sisters about her Christmas eve tradition of fancy grilled cheese with friends. She mentions a tip I had never heard before: using mayonnaise instead of butter for cooking the sandwiches.

I was intrigued and decided to try it out tonight and it worked perfectly! Whenever I use butter, I end up using a lot more than I would like in order to coat the bread enough for it to cook. A super thin layer of mayo cooked it perfectly. Plus, using less fat makes it a healthier meal. It's definitely what I will be using from now on! (I also highly recommend using Ezekiel Sprouted Grain bread and Pecorino Romano cheese....Mmmm!)

In lieu of a photograph of said delicious sandwich, I hope you will accept this adorable photo of our brand new puppy whose name is Ghost (however, Adam is pushing to change it to Falkor). As you can see, we have already started training him to attack squirrels. Maybe next year I will get some tomatoes after all!

Wednesday, October 6, 2010

Oatmeal Sandwich Bread

oatmealbread 14

I've been meaning to get more into bread baking for...about a year. I've made the occasional baguette here or there, but I have pretty much made the same recipe every time. Last Monday, I decided it was time to get to it. Tuesdays are my long day at school and the only day where I have to bring a lunch. I was out of my usual sprouted wheat bagels so I decided to make some sandwich bread. I've also been meaning to bake more from Kim Boyce's Good the Grain, so I was able to kill two birds with one stone by making her oatmeal sandwich loaf.

I'm going to try to make some type of bread once a week, and so far I've made it two weeks in a row. Hopefully I'll keep this habit up, because so far it has been delicious.

Oatmeal Sandwich Loaf
Adapted from Kim Boyce's Good to the Grain

2 1/4 tsp active dry yeast (or one packet)
3 tbsp unsulphured molasses
2 1/2 cups whole-wheat flour
2 cups bread flour
1 cup rolled oats
4 tbsp butter, melted and cooled
1 tbsp kosher salt

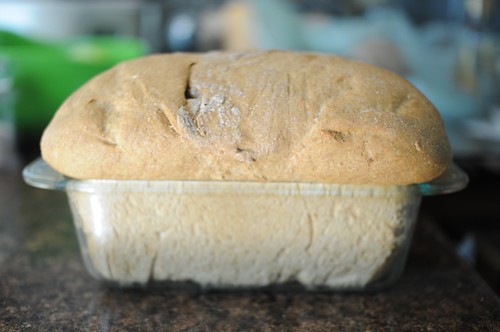
Butter a 9x5x3 loaf pan. My pan was a little smaller (8.5x4.5) and if yours is too, I'd recommend making a few rolls or a small boule with some of the dough. I crammed all of mine into the pan and it baked up ridiculously tall.

Combine the yeast and molasses with 2 cups of warm water and sit for about 5 minutes (until yeast bubbles). Add the flours, butter, and oats and stir with a wooden spoon. Then let sit, covered with a towel, for half an hour.

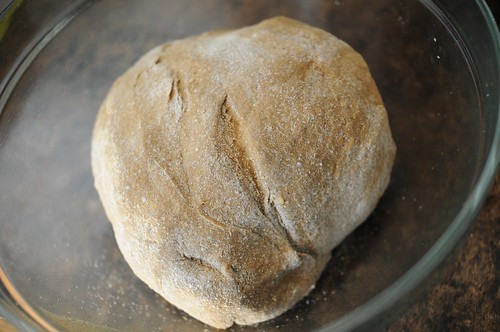
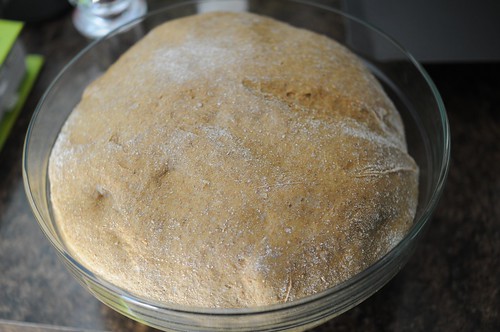
Add the salt and knead for 8-10 minutes, until dough is soft and only slightly sticky (or mix on medium speed in a stand mixer for 6 minutes). Put the dough into a buttered bowl, cover with a towel, and allow to rise until doubled in size (about one hour).

Before:
oatmealbread 4

After:
oatmealbread 5

Then shape the dough:
trio

First, flatten it out on a lightly floured surface (if making some rolls, take the dough out for that now). Then fold the top down and bottom up so that they meet in the middle. Press together the seam. Then put the dough into the pan with the seam down. Cover the pan with a towel and allow to rise again for another hour. Start preheating the oven to 400 degrees about 20 minutes before the hour is up.

oatmealbread 12

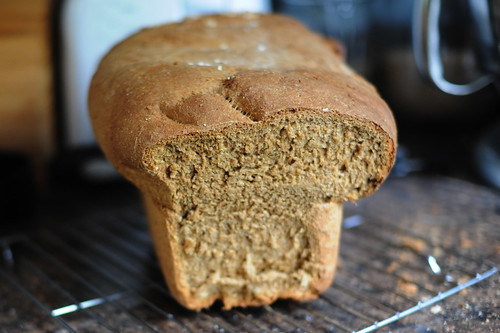
Bake for 40 minutes or until the loaf sounds hollow when you thump the top. Remove the loaf from the pan and let cool for a few hours until cutting, if you can stand to wait that long.