Sunday, July 17, 2011

Simple Vegan Cheesecake

Vegan Cheesecake

Hey there, long time, no see. My hiatus was partly laziness, partly technical difficulties, but I'm back with a new computer and new photo editing software and hopefully it will be better than ever?

This week was my friend Derek's birthday. He recently went vegan and wanted some cheesecake. I took the challenge and scoured the internet for recipes, eventually settling on the first one that comes up when you google "vegan cheesecake." It seemed to have good reviews and didn't require any fancy, expensive ingredients so I was all for it.

I started this morning by making vegan graham crackers because all the ones at the store contained honey. I was afraid they wouldn't crisp up properly and some of the thicker ones didn't, but that was mostly my fault for not rolling the dough thin enough. Most of them crisped up perfectly though.

Vegan Graham Crackers

I was a little nervous about the cheesecake base setting, but it turned out perfectly. Turns out, vegan cheesecake isn't so scary after all! Give it a try for the lovely vegans in your life.

Vegan Cheesecake

Vegan Cheesecake

Part One: Crust
From About.com

About 10 graham crackers (store bought or from recipe posted above)
1/4 cup evaporated cane juice
1/3 cup Earth Balance, melted

Put the the graham crackers in a zip lock bag and pound them with a meat hammer (ironic, no?) or a rolling pin until broken up into fine crumbs. In a bowl, combine the crumbs with the sugar, then add the Earth Balance and mix well. Press into a pie plate and chill until ready to use.


Part Two: Filling
Adapted from All Recipes

12 oz. silken firm tofu
1/2 cup almond milk (or any non-dairy milk)
1/2 cup evaporated cane sugar
1 tbsp vanilla extract
Scrapings from one vanilla bean (optional, I used one from an old jar of homemade vanilla extract
2 tbsp maple syrup (optional)

Preheat the oven to 350.

Combine all the ingredients in a blender or food processor until well combined. That's it. I almost forgot the maple syrup and tried the filling before hand it and it was definitely sweet enough on it's own. I added half the amount the original recipe called for and end result did have a subtle maple flavor. If you aren't a maple fan or want a plainer flavored cake, try adding even less or skipping it completely.

Vegan Cheesecake

Pour into the graham cracker crust and bake for 40 minutes or until the middle is just barely jiggly.

Put in the fridge and allow to chill completely. Garnish with fresh berries, chocolate, or whatever else you can come up with!

Thursday, April 14, 2011

Perfect Whole-Wheat Sandwich Bread

Whole Wheat Sandwich Bread

Remember when I told you about my plan to bake a loaf of bread from scratch every week?

Well, I thought you should know that I have definitely kept that promise. Every single week my kitchen fills with aroma of bread dough rising and then baking. I've made dozens of different kinds and now consider myself a master bread baker.

JUST KIDDING!

I made that one loaf, and another the next week...and this one in February. I haven't bought any bread at the store though, so it's not like I'm cheating. We just don't eat a lot of bread around here. Maybe I should give it another go and aim for once a month. That seems much more reasonable.

Anyway, the title really says it all here folks. The people at Cook's Illustrated know what they are talking about. There are a lot of steps (I broke it into two days), but the work is worth it. This bread is light but sturdy, with a crispy crust and soft interior. The recipe makes two loaves. I froze one and used it a week or two later. The crust wasn't as crisp, it was softer, more like the crust of the bread you would buy at the grocery store. If you prefer that texture, freeze the loaves for a few days and let thaw out before using. Otherwise, eat them as fast as you can!

Whole Wheat Sandwich Bread

Perfect Whole-Wheat Sandwich Bread
Adapted from Cook's Illustrated

Day One- Make Biga and Soaker:

Biga
2 cups bread flour
1 cup warm water (100-110 degrees)
1/2 tsp instant yeast

Combine all ingredients in a large bowl until mixed well. Cover the bowl with plastic wrap and leave out on the counter for 8-24 hours.

Soaker
3 cups whole-wheat flour
1/2 cup wheat germ
2 cups whole milk

Combine all ingredients in a large bowl and stir with a wooden spoon for about one minute. Knead the dough on a lightly floured surface until smooth, about 2-3 minutes. Put it back into the bowl, cover with plastic wrap, and leave in refrigerator for 8-24 hours.

Day 2- Rise and Bake:

1/4 cup honey
4 tsp table salt
2 tbsp instant yeast
6 tbsp unsalted butter, softened
2 tbsp vegetable oil

Take the soaker out of the fridge and tear into small, gumball sized pieces and put in the bowl a stand mixer. Clean the bowl it was in. Add the biga, honey, salt, eyast, butter and oil and mix using the dough hook for about 2 minutes. Then up the speed to medium and mix until dough is elastic, about 8-10 minutes. Roll the dough into a ball with your hands and put it into the clean (and lightly greased) bowl the soaker was in earlier. Let rise for 45 minutes.

Press the air out of the dough lightly and then hold the edge the dough and fold it over. Turn the bowl 90 degrees and repeat 7 more times. Cover and let rise for 45 more minutes.

Heat the oven to 400 degrees and lightly grease two loaf pans.

Divide the dough into two equally sized pieces and, using your hands, form each one into about an 8 by 17 inch rectangle. Then roll it from the short side, making a cylinder, pinch the ends close and place it seam side down in the loaf pan. Repeat with the other half of the dough. Cover the loaves with plastic wrap and rise let them sit and rise for another 60-90 minutes, until they are about 1 inch taller than the bread pan.

After the loaves have risen, make a shallow slash down the loaf lengthwise and put them in the oven. Put an empty loaf pan on the lowest oven rack and add two cups of boiling water (I just microwaved some), then close the door and put the temperature down to 350 degrees. Bake about 40-50 minutes and rotate halfway through.

Allow the loaves to cool in the pans for 5 minutes, then transfer them to a wire rack and allow to cool completely before cutting, if you can resist the smell of freshly baked bread (I couldn't).

Wednesday, March 23, 2011

Creamy Cauliflower Macaroni and Cheese

Creamy Cauliflower Mac & Cheese

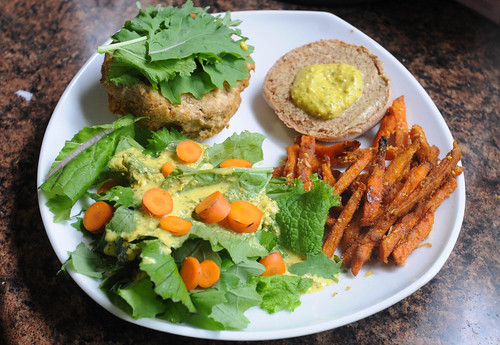
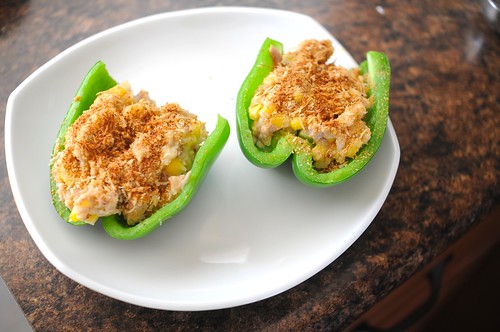
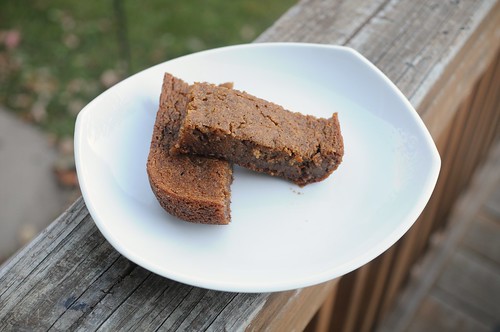
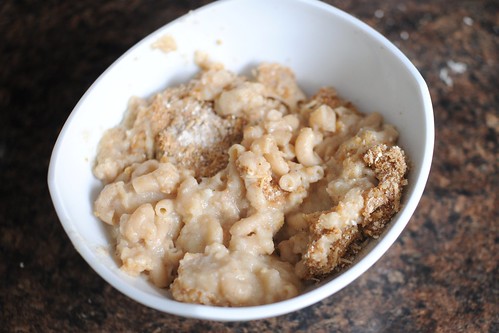
I'm not going to lie to you. This dish is not very attractive (It looks 
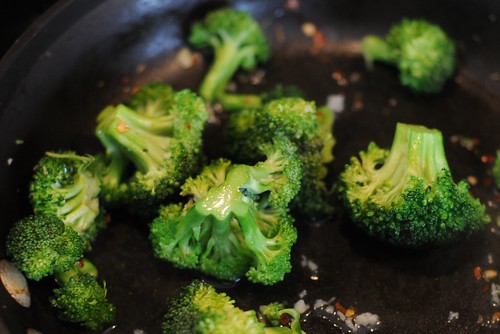
just like this one specific thing that I won't mention here or else you will be totally turned off from ever giving it a shot). It is all brown. And blah. Normally I try to avoid such monochrome things, but there are veggies hidden in here (well, one veggie), so I give it a pass. You might want to serve it with something colorful though. Just sayin'.

This is a healthy macaroni and cheese recipe by Mark Bittman (I saw it linked to recently on Carrots 'N Cake). It may not be ooey, gooey, or overly cheese like the mac and cheese that you may love, but it is pretty darn good and the fact that it is good for you? That is also good. Good, good, good. Believe me. I am kind of a mac & cheese snob. My mother used to make the kind that came in a blue box with the thick liquid cheese sauce in a shiny silver packet. At some point, this grossed me out (Adult Laura is proud of you, former tiny self). The first time I ever had mac & cheese I liked was at Michael Jordan's restaurant in Chicago. It was made with real cheese. Nothing from a silver packet. It was good.

Since then, I only eat that fancy old-fashioned mac and cheese. None of that powdered microwave garbage.

Anyway, that had very little to do with this recipe, because it won't make you forget about the gooey cheesey goodness that is gourmet macaroni and cheese. There is no cream, no butter, and a modest amount of cheese. The bulk of the sauce is made up of pureed cauliflower. It tastes fantastic and won't make you feel like you are going to have a heart attack as its creamy, cheesy cousins might. In fact, it makes you feel great, like you are going to live a very long time and you can go off and run a 5K in a few hours. (which is actually what I'm going to go do).

If you're craving mac and cheese, this might not satisfy you. If you are craving a healthy, filling, vegetarian, protein-packed dish, then this is a winner (20 grams of protein if you're curious).

Creamy Cauliflower Macaroni and Cheese
Adapted from Mark Bittman

2 1/2 cups vegetable stock
2 bay leaves
1 cauliflower, cored and cut into florets
8 oz. whole wheat elbow macaroni
1/2 cup cheese (I used gruyere & emmantal, Bittman also suggests sharp cheddar)
2 tbsp olive oil
1 tbsp dijon mustard
1/8 tsp nutmeg
salt and pepper to taste
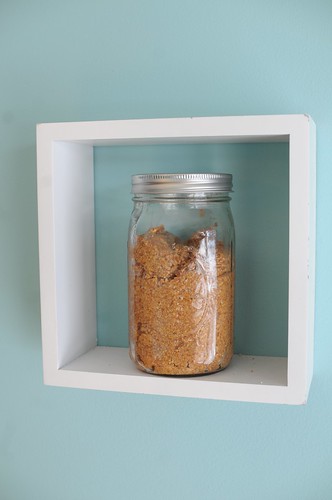
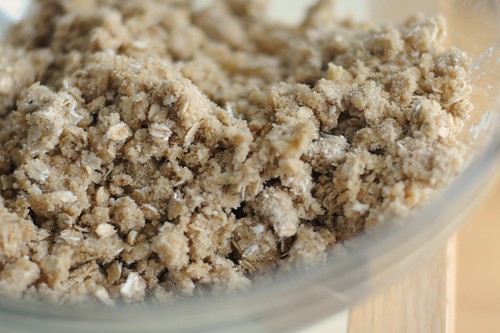
1/2 cup whole grain breadcrumbs
1/4 cup grated parmesan

Preheat the oven and get a pot of salted water boiling. In a small saucepan, heat the vegetable stock with the bay leaves for 5 minutes, then remove the bay leaves and set aside.

Cauliflower

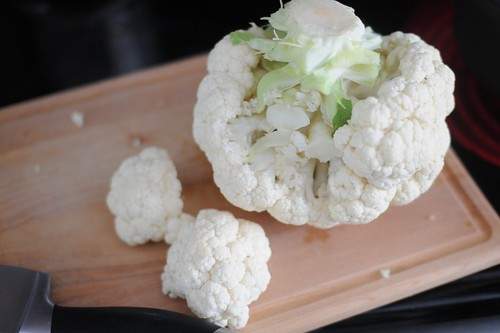
Cook the cauliflower in the water for 25 minutes. Remove the cauliflower from the water. If you haven't read through this recipe well beforehand, you might just get out a colander and dump the cauliflower into it and the water down the drain. Don't do that. Use a spoon or tongs and put it into a food processor. It may be slightly annoying, but then you already have boiling water to cook the pasta in. How nifty. If there is a little bit of cauliflower still floating in the water, don't worry. It's cool.

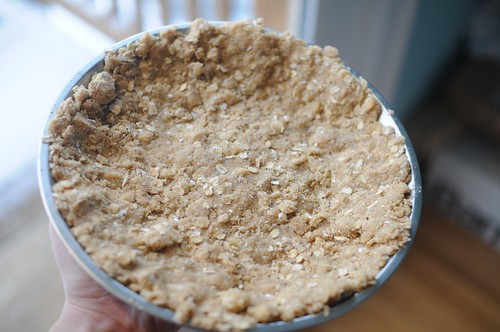
Cook the pasta for 5 minutes. You can totally dump that in a colander when you're done and rinse it in cold water. Then put it into a greased pan. I used a 7x11 pyrex dish. Bittman suggests a 9 inch square pan. I don't have one of those.

Add the vegetable broth to the cauliflower and process until combined. Then add oil, cheese, mustard, nutmeg, salt, and pepper to the food processor and pulse a few more times.

Creamy Cauliflower Mac & Cheese

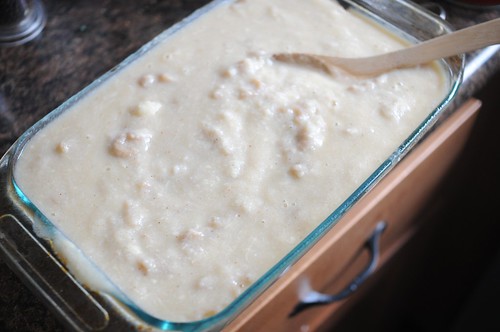
Pour the sauce over the macaroni and stir a little. Be careful, the dish will be very full. Sprinkle the breadcrumbs and parmesan on top and bake for 20 mintues. If you only have 1/4 cup of breadcrumbs, then look into your pantry and the perfect substitue might be staring you in the face.

Matzo Meal

Makes four very large and very filling servings.

Thursday, March 17, 2011

Damn Good Peanut Butter

Peanut Butter

Earlier this year, Adam and I decided to stop by Hell's Kitchen for their famous brunch. I had the lemon ricotta pancakes, which were delicious, but that is not what we are going to talk about today.

Today we're here to discuss....peanut butter.

I had read something on the menu about their peanut butter, but didn't give it much thought. They brought some out with Adam's toast, but I didn't give it a second look until I was done with my pancakes and waiting for him to finish, a frequent occurrence, as I am married to the world's slowest eater. I was bored and I put a tiny scoop on my plate, wiped it up with my finger, and put it in my mouth.

My life changed.

I'm not sure if it was for better or worse. Better maybe, because I had just tasted the best peanut butter in the entire world. Worse maybe, because I cannot eat any other peanut butter again. I bough a small jar for $6 and it disappeared way to fast for it to become my new go-to peanut butter. I decided I would have to recreate it myself. Then I remembered that the Internet exists and just looked it up. I made myself a batch and it tastes just like the real thing. It is a little bit thicker and it doesn't spread as easily, so you just have to use a little more. Once you taste it though, you won't be complaining about that one bit.

Damn Good Peanut Butter
Adapted from Village Voice

3 cups raw salted spanish peanuts, skins on (I bought mine at NutsOnline)*
6 tbsp honey
5 tbsp light brown sugar
2 1/2 tsp kosher salt
7 tbsp peanut oil
5 tbsp unsalted butter

*You can also skip the first step and buy pre-roasted nuts if you are lazy. I won't judge you.

Preheat the oven to 375. Spread the peanuts in a single layer on a baking sheet and roast for 50 minutes, rotating the sheet 180 degrees at the half-way point.
Raw Peanuts

When they are done, they should look like this:
Roasted Peanuts

According the Mitch Omer, the chef, "If they look like espresso coffee beans, well, you fucked up. Start over." Hopefully you don't have to start over. Let them cool before proceeding.

Put the cooled peanuts into a food processor and process for just about 30 seconds. The consistency should be like really chunky sand. Transfer them to the bowl of a stand mixer (but keep the food processor handy) and mix in the honey, brown sugar, and salt with the paddle attachement for about one minute.

In the food processor, mix the butter and peanut oil for about 10 seconds, until emulsified. Then add this to the stand mixer bowl and stir on low until well-mixed.

The recipe says it will keep in a jar for 4 weeks, but I doubt it will be around that long.

Peanut Butter

Tuna and Grain Stuffed Bell Peppers

Tuna and Rice Stuffed Bell Peppers

I have been trying to eat more fish lately, because it's good for you and has that protein stuff in it, which is slight challenge to get enough of for people who do not eat meat on a daily basis...or ever. I'm supposed to eat at least 60g a day. I'm really good at eating more than 45 and pretty good at more than 50. But I rarely meet that 60g mark. I'm working on it though.

Enter tuna.

When I was a kid, I refused to touch the stuff. In fact, this recipe might be the only thing I've ever eaten with tuna in it (at least that I can remember). It was my quest for more protein that led me to make this recipe several times my senior year of college, and again, a few weeks ago. Like the persimmon pudding I recently posted, I have no idea where this recipe came from. In fact, I didn't even have the ingredients list for this one, I recreated it from memory. I think I did a good job because it tasted exactly how I remembered it. So thank you, mysterious source of this recipe, for helping me get my protein on.

Tuna and Grain Stuffed Bell Peppers

2/3 cup five grain mix, cooked (rice, quinoa, or millet would work great too)
4 medium bell peppers
2 5oz. cans of tuna, drained
1 can yellow sweet corn
1/2 cup shredded cheddar cheese
2 tbsp breadcrumbs
1 tbsp grated parmesan cheese
salt & pepper

Cut the tops off of each bell pepper, remove the insides, and cut in half. Broil each side about 5 minutes, until the peppers begin to brown.

While they are broiling, mix the cooked rice, tuna, corn, and cheese in a bowl. If the rice was made earlier and is cold or room temperature, heat it up in the microwave or on the stove first. Add salt and pepper to taste. Fill each bell pepper with the mixture.

In a small bowl, mix the bread crumbs and parmesan cheese. Sprinkle this on top of the mixture in the bell peppers. Broil again until the breadcrumbs & cheese turn slightly brown.

Serves 4.

Wednesday, March 9, 2011

Vegan Persimmon Pudding

Persimmons

I realize it has been awhile. I know. I'm sorry. I have a biochemistry test tomorrow. Lots of studying to do. TONS. So right now seems like a great time for a post, right? Of course!

This recipe was actually going to be the second recipe I posted on this blog back in the Winter of 2009. Unfortunately, I was dealing with some stubborn persimmons. The persimmons I purchased became ripe, one by one, and I pureed them and stored them in my freezer. Eventually they became Chocolate Persimmon Muffins.

This fall, I bought some more persimmons, made this lovely pudding for you, uploaded the pictures, and promptly forgot about them as I was busy doing things like organic chemistry, applying to grad school, and starting two new jobs.

So, here we are. Are persimmons still around? I don't know, but if not, hopefully you'll think of this or the muffins when they pop up in the produce aisle. This isn't pudding like the pudding that comes in those cute little cups. It is closer to English Christmas Pudding. Sort of a very moist quick bread. (Sorry if you are one of those people who hates the word moist. I don't really like it either, but the thesaurus didn't give me any better options. Damp? Soggy? No thanks!)

Persimmon Pudding

Vegan Persimmon Pudding
Adapted from...well, actually I have no idea where. All I remember is that someone tweeted the link to it. If you know where it's from, let me know and I'll update this post. When I made it the second time, I changed it a bit and made it vegan since I was out of eggs and probably didn't have any milk (I pretty much never have any milk, except unsweetened almond milk, which I have multiple cartons of at all times. And I'm not even vegan. I'm weird like that.)

2 cups whole wheat pastry flour (or all-purpose)
1 1/2 cups sugar
1 tsp cinnamon
1 tsp baking soda
1/4 tsp salt
2 cups persimmon pulp (about 3 pureed in a food processor)
1 3/4 cup almond milk (or any milk)
2 flax eggs (2 tbsp flax meal + 6 tbsp water, allow to sit a few minutes until goopy) (or 2 eggs)
1/4 cup earth balance, melted (or butter)

Preheat the oven to 350 degrees and grease a 9x13 pan.

Put the flour, sugar, cinnamon, baking soda, and salt in a medium bowl and stir with a whisk until mixed together.

In a separate bowl, combine the pulp, milk, eggs, and earth balance. Add the dry ingredients to the wet and stir until combined.

Pour the batter into a pan and bake for 40-50 minutes. It should spring back when gently poked in the center.

Cut into squares and serve.

Makes 16 squares.

Sunday, January 23, 2011

Double Chocolate Chip Cookies

Double Chocolate Chip Cookies
(This is an awful photo. Oops.)

This past July I met up with some friends for some intimate shows put on by one of our favorite bands, two in New Jersey and two in Vienna, VA. In between the two New Jersey shows, my friend Laura and I headed into NYC. Laura is gluten-free and vegan, so naturally one of our stops was at Babycakes, a vegan, mostly gluten-free bakery.

I'll have to admit, I wasn't quite sure what to expect. I eat a lot of vegan food, but I'd never really had any vegan baked goods before, let alone gluten-free ones. After one bite of a carrot cupcake, I was in love. I'd gladly live the rest of my life eating only donuts, cupcakes, cookies, brownies and muffins from that bakery. If you aren't vegan, I promise you won't miss the butter or eggs at all. You'll forget they ever existed.

Yesterday I picked up the Babycakes cookbook and made these delicious cookies. They are light, crispy and have a faint coconut flavor from the coconut oil. If you aren't gluten-free, you should be able to use regular all-purpose flour and skip the xanthan gum.

Double Chocolate Chip Cookies

Double Chocolate Chip Cookies
Adapted from the Babycakes Cookbook

1 cup coconut oil (measure when melted)
1¼ cups evaporated cane juice (or sugar)
¹⁄³ cup homemade applesauce or store-bought unsweetened applesauce
½ cup unsweetened cocoa powder (not dutch processed)
1 teaspoon salt
2 tablespoons pure vanilla extract
1½ cups bob’s red mill gluten-free all-purpose baking flour (or regular all-purpose flour if you don't have a problem with gluten)
¼ cup flax meal
1 teaspoon baking soda
1½ teaspoons xanthan gum (skip if you use regular all-purpose flour)
1 cup vegan chocolate chips (or regular)

Preheat the oven to 325 degrees.

Combine the coconut oil, evaporated cane juice, applesauce, cocoa powder, salt, and vanilla in a medium bowl. In a separate bowl, whisk together the flour, flax meal, baking soda, and xanthan gum. Add the dry ingredients to the wet in two batches, mixing until just incorporated. Stir in the chocolate chips with a wooden spoon.

Form the dough into balls about 1 inch in diameter and press down slightly onto parchment covered cookie sheets. Bake for 14 minutes, turning the pans 180 degrees after 9 minutes. Let cool 10 minutes on the sheet and then transfer to a wire rack. If you don't want to bake all the cookies, you can freeze the cookie dough balls and bake later.

Makes 3 dozen cookies.

Wednesday, January 12, 2011

Pumpkin Pie with Oatmeal Walnut Crust

Pumpkin Pie

Above is a photo of the most delicious pumpkin pie that has ever been created. It didn't get photographed after it was baked because it didn't stick around very long.

It started with a motorcycle ride to St. Paul. Adam bought one this summer and they freak me out, but I agreed to hop on the back to get some tacos. On the way home, I convinced him to take me to Birchwood Cafe for dessert and I had their Sweet Potato pie with Oatmeal Walnut crust.

Oh. My. God.

The crust was out of this world amazing. When Thanksgiving rolled around (yes, I am super late with this post), I knew I had to recreate it. For the insides, I decided to try out a recipe from 101 Cookbooks that used coconut milk and hazelnut paste (if the coconut milk freaks you out, don't worry, you can't taste it in the end result). I even skipped the can stuff and made puree from a pumpkin Alex and I got from our CSA. I had enough to make one pie and 4 tiny ramekin sized pies. I brought the big pie to Adam's family, where we ate Thanksgiving dinner, and the tiny ones to my family who I saw the next day. It got rave reviews all around, especially this crust. Really. Try this crust. I think it would be great with fruit pies too.

It's also worth mentioning that while this pie was in the oven, a giant squirrel fell into our chimney and proceeded to make the most terrible noises I have ever heard for over 2 hours until someone from Wildlife Rescue came and got him out. Just another reason to hate squirrels.

Oatmeal Walnut Crust

Oatmeal Walnut Crust
Adapted from here

3/4 cup flour (I used whole wheat pastry)
3/4 cup rolled or quick oats
1/4 tsp baking soda
3/4 cup brown sugar
1/2 cup butter, softened
1/2 cup walnut pieces

Combine flour, oats, baking soda, and brown sugar (I used a food processor). Add the butter and pulse until combined. Stir the the walnuts pieces and press into the pie pan.

Makes enough for one pie.

Oatmeal Walnut Crust

Pumpkin Pie with Coconut Milk
Adapted from 101 Cookbooks

1.5 cups toasted hazelnuts (Put hazelnuts into 350 degree oven for 10-15 minutes)
1/2 cup brown sugar
1 tablespoon pumpkin pie spice
1 teaspoon salt
1 tablespoon cornstarch
1 1/2 cups of roasted pumpkin puree or canned pumpkin
1 teaspoon vanilla extract
3 eggs
1 cup coconut milk

Preheat the oven to 350 degrees.

Pulse the hazelnuts in a food processor until they become a paste. Spread over the bottom of the pie crust.

In a large bowl, combine the brown sugar, pumpkin pie spice, salt, and cornstarch. Follow with the pumpkin and vanilla. Finally, add the eggs and coconut milk.

Pour into the pie crust and bake for 45-55 minutes, or until the filling sets and only barely jiggles in the middle. Allow to cool completely before serving.

Saturday, January 1, 2011

Whole Wheat Broccoli Calzones

Calzone

A few weeks ago I saw a recipe for Easy Veggie Artichoke and Olive Calzones on Kohler Created and made them for dinner that night, using spinach instead of olives, which happen to be one of the three foods I dislike (The full trifecta of ew includes olives, blueberries, and fennel). A few days later I was trying to use up all the produce in the fridge and decided to try it with a whole-wheat crust stuffed with broccoli, cooking it the same way I had been to make Broccoli & Feta stuffed sweet potatoes (a new favorite). The end result was an easy, filling dinner that I've made several times and plan on making frequently in the future.

Whole Wheat Broccoli Calzones
Crust adapted from Kohler Created

Makes 2 calzones.

Crust:
1/2 cup plus 2 tbsp warm water
1 1/4 tsp active-dry yeast (or half a packet)
1 cup bread flour
1/2 cup whole wheat flour
1/4 tsp salt
2 tbsp brown sugar
1 tbsp olive oil
1 beaten egg for egg wash (optional)

Filling:
2 tsp olive oil
2 cups broccoli, chopped
2 cloves garlic, pressed
Red pepper flakes to taste
1/4 cup water
Tomato sauce (I used some from a jar of Muir Glen Garden Tomato I have been trying to finish off)
1/2 cup shredded cheese (I used a mix of cheddar and mozzarella)

1. Preheat the oven to 375 degrees and line a baking sheet with parchment paper. In the bowl of a stand mixer, add the water and the yeast and stir. Add the flour, salt, brown sugar, and mix with the dough hook until it comes together into a slightly sticky ball. Pour the olive oil on top, cover, and allow to rise for 30-45 minutes.

Garlic

2. While the dough rises, make the filling. Heat the olive oil in a pan along with the garlic and red pepper flakes over medium heat. When the oil starts to bubble, add the broccoli and stir fry for a couple minutes (it should turn a brighter shade of green). Add the water and once it boils, lower the heat and allow to simmer until the water is mostly gone and the broccoli is tender, about 8 minutes.

Broccoli

3. After the dough has risen, knead a few times to incorporate the olive oil, and divide into two balls and roll each into a long, ovalish shape. Add the filling and fold the top over
and seal.

Calzone

Calzone

4. Brush tops with egg wash (if desired) and bake for 18-22 minutes and serve.